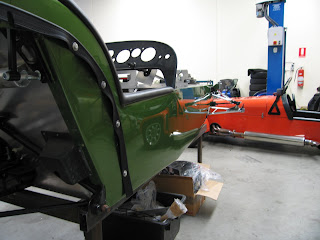
However, as with most things, there are other activities that can happen in the meantime. We moved to fitting the drivers seat. Because of the range of relative sizes of the two main drivers (Dad and I), we needed to put the adjustable runners into the car. In most vehicles that wouldn’t matter, it’s just that in this sort of car it’s all or nothing – if I can reach the pedals, Dad can’t. If Dad can reach the pedals, I can’t get my knees under the dash. So the movable seat is required.
 The downside apparently is around the stability of the seat. As the runners are mobile, and the anchor points are brought inside the main runners, the stability suffers, by all account. Whilst the seat isn’t structural – it doesn’t hold you in, the belt does – it is important to feel secure, and to have all the messages from the chassis translated through the seat to your backside properly.
 So there were a couple of things to do. Bolt the runners in – no problem. Cut a hole in the bottom of the seat to allow space for the runner – slight problem. The measurements in the book would have put a huge hole in completely the wrong place. And now this is where Dad comes into his own – measuring and measuring and measuring against to get it right, even if it doesn’t matter as you can’t see the holes. Did it all, and it turns out to be a really nice, neat job.
Dad also came up with a good idea to resolve the stability issue. We’re going to craft a simple metal frame that goes between the bottom of the seat and the squab. This will anchor the seat tightly to the frame, and spread the load a little wider than the underlying frame. Simple and cheap – gotta be a first for this build.
We also bolted the wiper motor on. No real excitement there.
So for a day’s effort, we put a seat in. This could take a while, especially as my work now takes me to Melbourne basically full-time until the middle of July, at which point I might take a few weeks off to focus on the car. Then the blog updates will come fast and furious, I promise.
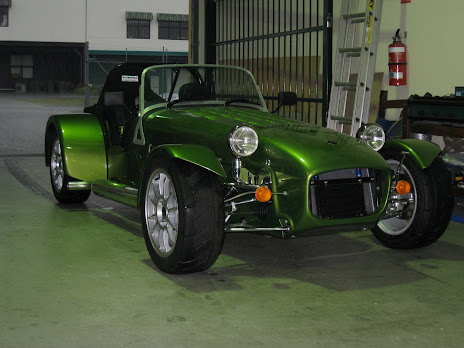
You’ll also notice some photos of the car in this posting – what do ya’ll think of the colour?

 people.
7 comments:
errr.... very green!!!! going to break it up with some colour?
Yeah, the interior adds some black, the windscreen some silver, the suspension some chrome, black wheels, tail lights....that sort of thing.
Also thinking about painting the uprights red - you can't really seen them all that much apart form the occaisional glimpse through the rims. What do you think?
Personally I think the green is superb, keep all the detailing black and it will look really good. I'd steer clear of red bits......but thats a personal thing I have......red claipers look fine on Porsches or Ferraris......but not on se7ens in my opinion.
Anyway good to see IRS cars hit the road. I drove the prototype in the UK and it was a fantastic car.
Aha! Someone likes the colour. Good, so do I. Thanks for the support in a cruel and jealous world.....
You may be right on the red calipers. I'm going to have a trial fitting of the front end and see what I think. I may also just paint 'em black and be conservative to start with, then get a little more creative later.
Yellow Stripe would look good! (hehe) or carbon gaurds!
Been a while since your've had a post! You haven't given up have you?
Nah, haven't given up, just trapped in Melbourne at the moment on a project. I'll be back late July and moving it forward once more.
Post a Comment