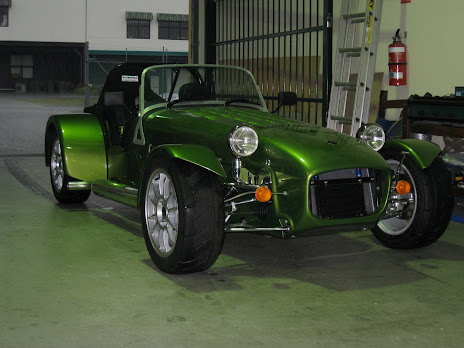
So, the nose is off, as is the scuttle. Nothing tricky there. However, in order to feel like I've actually achieved something, I though taking the first steps of installing the steering rack and front wishbones would at least show some progress.
The chassis arrived with most of the steering already installed, although I will be giving everything a good torquing to later on when I get a torque wrench. So it was just a matter of removing some more stuff and bolting the one extra part in.
 And it's now that I understand why these things take a year. Dad and I must have put that thing in six times, each time realising that this bit should actually go over that bit, or that to put this in, week needed to have done this and that in step 1. All I can say is thank goodness for digital cameras.
It's probably also worth describing my build sequence at this point as well. The idea is that the build will go in, say, four stages:
- Stage 1 - prebuild. Dad and I will fit everything possible to the car, making sure we have all the bits etc, but will not tighten anything to it's final levels at this stage. We'll drill the holes for the tonneau, windscreen washers and bottle, seat rails etc, fit the rollover bar, suspension etc. The idea is to get a rolling chassis. This will also give us something concrete to start planning colour schemes etc.
- Stage 2 - paint. The car will head back to Perth, get put on the paint stand, and have most of the various bits removed before painting.
- Stage 3 - rebuild. The car, once painted, will be rebuilt from the start and everything torqued up, nylocs etc replaced where required etc. After Stage 1, this should be a meccano set build.
- Stage 4 - drivetrain, wiring etc. The final bits and pieces.
Anyway, the steering rack eventually went in, although it's not a terribly good fit, and I'm assuming that the aluminium blocks holding the rack will crush in around it to hold it secure.
The upper and lower wishbones were also a simple plug and play operation, albeit with a few exertions to get the ends into the brackets. It's a tight fit in there ;-) I'm just waiting on the front sway bar and shocks / springs to arrive before these are fitted, along with the uprights. Then I can put the wheels on a see what they look like.....but now, looking at my hectic social calendar, plus time commitments from my MBA, it will be a few weeks before I get back to the build.
However, there's still the engine to talk about, plus a few car related events to occur between now and then, so my faithful 150 readers, stay tuned ;-)


3 comments:
Post more photos man!
LOL, you must be like a kid in a candy store...It looks like the Birkin comes largely 'together' rather than as a big bag of bolts etc ?
Did you buy the comprehensive kit ?
By the way, if you want a piccy with the exhaust on the 'right' side try this...
http://www.birkin.com.au/imageview.php?iid=1590
There is a few of this car on the Birkin website.
Cheers,
Marc.
OK, OK, more photo's it is.
And yes, I did buy the comprehensive kit, as one of the things I'm not so good at is trawling through wreckers and buying things that way. I wouldn't know a Cortina upright from a Sierra diff (ok, well maybe), so the full kit from Birkin was quite attractive.
In terms of coming all "together", a lot of things came installed, but you have to take it all off again to start a lot of the work. The only bit I didn't remove was the steering column, but I will make sure it's torqued up properly. There are still a daunting number of bolts to be considered.
Post a Comment