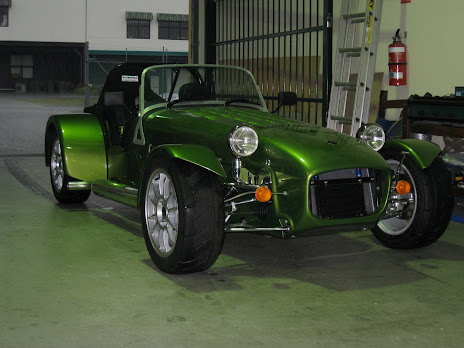
One of the tasks I had put aside for a rainy day, but thought I may as well do now as I have the time, is to install the racing seat.
Basically, the reasoning behind a racing seat is that it holds the driver in place better than the standard seat. In normal road use, this isn't a problem, however under the stresses of track use, a better seat is required.
I've bought a 15 inch Road / Race seat from Go Gear (www.gogear.com.au). The seat itself is an aluminium seat with a foam cover - pretty basic, but it fits into the Birkin with some modifications. So, I go out and spend over $600 on a seat, and then attack it with a sledgehammer.
To get the seat to fit, you need to bend the right hand shoulder wing in, as it doesn't clear the side of the car. Then you do the other side so it doesn't look to lopsided. Then you sit in it and work out that you don't fit anymore....so you hit it a few more times.
I also ground off the welds underneath the seat, removed a few studs, and bash in the side support around the base to give more clearance for the base. And it all fits in fine! I've also removed the sliders under the seat, and mounted the new seat to rivnuts put into the seating frame itself.
The seat means that I'm now really, really, held into the car, plus I'm a lot lower. I've also had to move the pedal box once more, as I'm also a lot further back in the car than before.
I'm also still waiting for the engine parts to come back, but again I'm expecting them this weekend.
The Birkin

The finished article
Thursday, February 28, 2008
Saturday, February 9, 2008
And now the front end
With the back end mostly done, attention switches to the front end. Basically the nosecone can now get fitted up, and the front indicators installed.
The first thing is putting the Birkin badge on the nose - pretty simple, but the black and silver looks really good against the green, and matches the rest of the car.
Getting the front indicators on is another matter. The indicators have to be within a certain distance from the outer edge of the car, which for the Birkin is the front wheel. To get these on, you have to drill two 10mm holes in the fibreglass nose - however the fibreglass is pretty brittle, and tends to shatter and flake, taking the paint with it. I drilled a few pilot holes, and luckily the damage to the paint isn't too bad (it's covered by the washer). But there's another thing I should have done before painting....
I also had a shot at putting the bonnett clips back on using stainless rivets, however got the size completely wrong and had to drill them all out. This worked well apart from the last two, so I've managed to gouge the aluminium skin a little. It'll be covered by the latch when it goes on again, but it looked pretty dodgy for a while there.
Anyway, more photos to be added.
And an update on the engine - delivery of all the parts promised for the end of next week ;-)
Subscribe to:
Comments (Atom)
